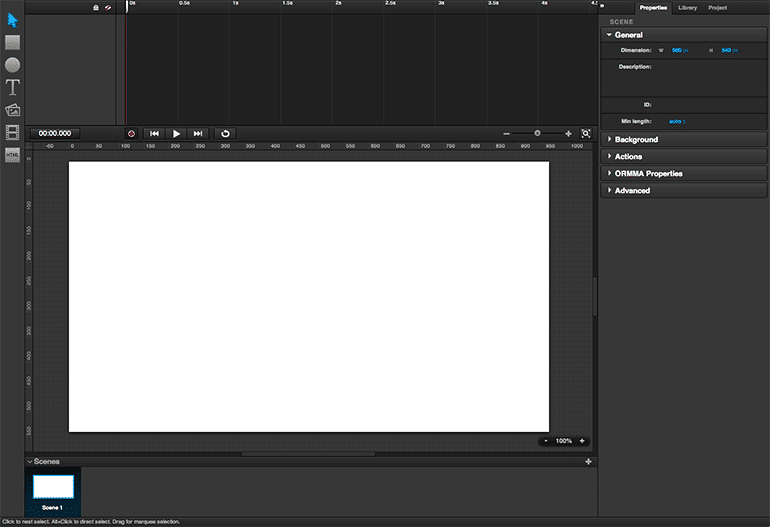
This guide is intended to help you get your hands on Animator controls and take you through basic techniques for building CSS3 Transformation-based animations using the tool. Follow the steps described here to build a simple project composed of a single scene. You add objects, set their properties, and export and run the project when it’s complete.
Before starting, please do the following:
- Download theq_st_11.png project assets. The
assetsfolder contains the images used here; save it to a location that’s easy to find. It also contains the fileRocking Boat.anim, which you can open in Animator if you want to see the finished product and preview it in Animator or a browser. - Take the Animator Guided Tour. The steps described here build on the exercises from the Guided Tour.
- Set your system default browser to Safari or Chrome so you can preview the project in a browser supported by Animator.
Please follow the steps as:
1) Start the project
First you should create a new project and set it up.
- Open Animator. This will automatically create a new project for you.
- In the right panel, select Properties and under General, change Dimensions to W: 960 px and H: 540 px. This will enlarge the stage.
2) Add water images
The next steps are to add images to the project’s single scene. We will also name them, put them in the proper front-to-back order, and position them on the Stage.
Importing the first wave image.
- Select the Image Tool (or press I on keyboard) and click anywhere on the stage.
- Under properties, General, change Image property by clicking … and selecting the image water1.png from the assets package that you downloaded.
Set image base properties.
- Select the base state of the image by either double-clicking it on the stage or clicking the purple diamond next to New Image object in the Object Tree.
- Name the image. Double click New Image name in the Object tree and change it to water light. Alternatively, after selecting the object base state you can change the name in the right panel, under Properties–>General–>Name.
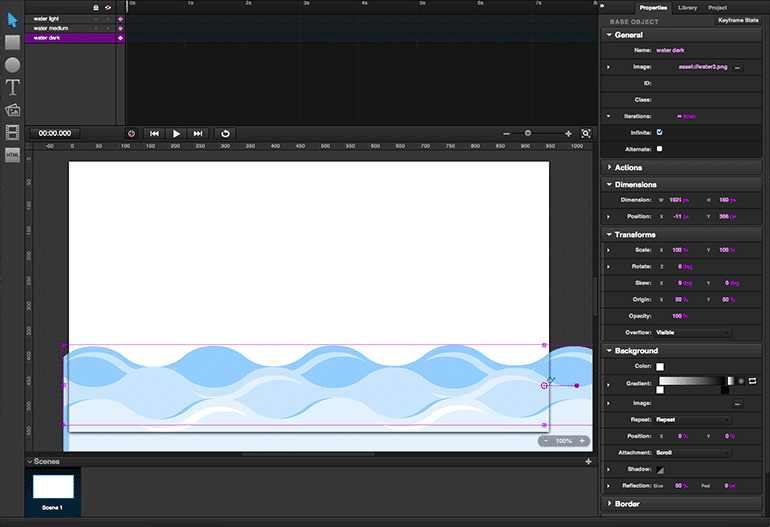
- Position the image. In the right panel, under Properties–>Dimensions–>Position, change values to X: -11 px and Y: 471 px. This sets the location of the upper left corner of the water light image 11 pixels to the left and 471 pixels below the upper left corner of the stage.
- Set iterations for infinite. Because we want the waves to roll continuously, we set the animation to repeat indefinitely. To achieve this, under Properties–>General–>Iterations, click the triangle to open additional settings, and tick Infinite. Alternatively, you can enter 0 for Iterations, this has the same effect.
Import and set properties for other wave images
Repeat the steps above in order to import and set properties for 2 more wave images.
For water medium:
Import water2.png
Set name to water medium
Set position to X: -11 px and Y: 409 px
Set iterations to Infinite.
In object tree, drag the water medium below water light, in order to place it behind it.
For water dark:
Import water3.png
Set name to water dark
Set position to X: -11 px and Y: 366 px
Set iterations to Infinite.
In object tree, drag the water dark below water medium, in order to place it behind it.
After you complete these steps, the Stage should look like this:
3) Animate the water images
Now that the water images have been positioned in the project, make them look like waves by applying a parallax animation effect. Parallax effect is achieved by animating objects that are supposed to appear in the front at faster speeds than objects that are supposed to be more distant. In order to achieve this, water light will move the quickest, while water medium will move more slowly, and water dark even slower.
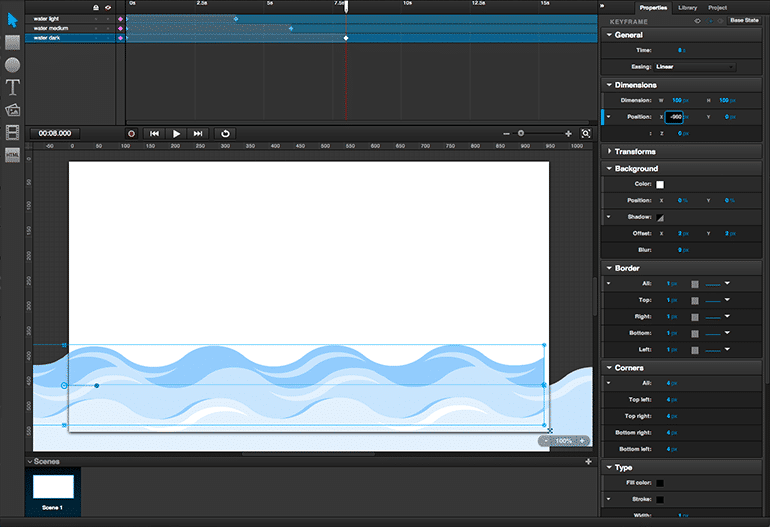
This animation effect is accomplished by setting two keyframes for each object, with each object’s first keyframe set at zero seconds and its second keyframe set at a different time. The second keyframe has to have an offset to its X coordinate of -960, since the images occupy the entire 960 pixel width of the scene and repeat at the 960 pixel mark. Finally, animation easing is set to smooth the animation.
You can always preview an animation by clicking Play button (or pressing Spacebar on keyboard).
Animate water light.
- If the timeline indicator is not placed at 0 seconds, drag it all the way to the left. Alternatively, click the clock, and enter 0 to set the indicator to 0 seconds.
- Create first keyframe. Select water light. Create a new keyframe by clicking the button Keyframe State in the right panel, under Properties, and then clicking the diamond icon Add Keyframe. Alternatively, you can add keyframe by clicking the diamond icon on the object on stage, or double clicking the timeline on the spot where you would like to add a keyframe. Creating a keyframe automatically selects it. Keyframes can be selected by clicking them in the timeline.
- Set first keyframe easing. In the right panel, under Properties–>General–>Easing, select Linear.
- Create second keyframe. Move the timeline indicator to 4 second mark on the timeline. Insert keyframe by clicking the button Keyframe State in the right panel, under Properties, and then clicking the diamond icon Add Keyframe.
- Set second keyframe easing. In the right panel, under Properties–>General–>Easing, select Linear.
- Set second keyframe position. In the right panel, under Properties–>Dimensions–>Positions, set X: -960 px.
Animate water medium.
- Create first keyframe at 0 seconds.
- Set first keyframe easing to Linear.
- Create second keyframe at 6 seconds.
- Set second keyframe easing to Linear.
- Set second keyframe position to X: -960 px.
Animate water dark.
- Create first keyframe at 0 seconds.
- Set first keyframe easing to Linear.
- Create second keyframe at 8 seconds.
- Set second keyframe easing to Linear.
- Set second keyframe position to X: -960 px.
4) Add clouds image
Add Cloud image
- Import clouds.png
- Set name to clouds
- Set position to X: 0 px and Y: 0 px
- Set iterations to Infinite.
- In object tree, drag the clouds below water dark, in order to place it behind it.
Animate Cloud image
- Create first keyframe at 0 seconds.
- Set first keyframe easing to Linear.
- Create second keyframe at 15 seconds.
- Set second keyframe easing to Linear.
- Set second keyframe position to X: -960 px.
5) Add Background
To add background, select Rectangle Tool (or press U on the keyboard). Then click on the stage to add a new rectangle.
Select rectangle and change basic properties as follows:
- Set name to background.
- Set dimensions to W: 960 px and H: 540 px, to match the stage size.
- Set position to X: 0 px and Y: 0 px.
- In object tree, drag the background below clouds, in order to place it behind it.
Next, change the more advanced properties in order to make the background appear more like the sky.
- Turn off border. All rectangle elements initially have a 1 px thick border. This is not needed for the background, so turn it off. In the right panel, under Properties–>Borders, click the purple rectangle to turn off this property.
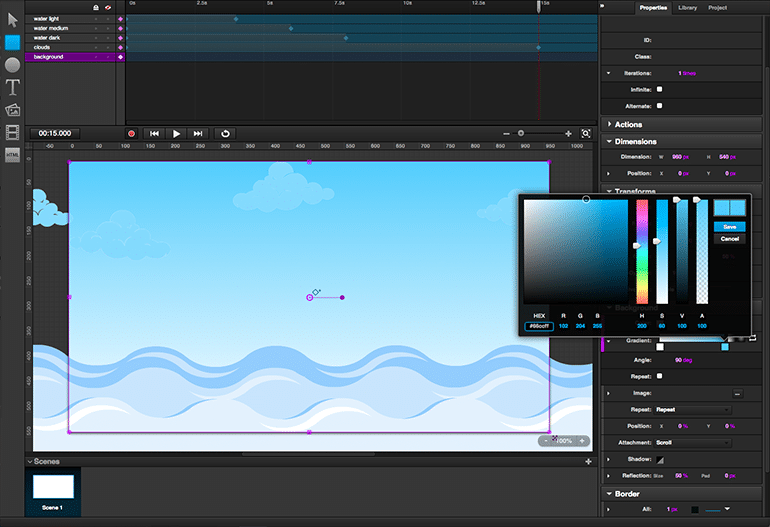
- Enable color gradient. In order to set gradient, in the right panel, under Properties–>Background–>Gradient, click the purple rectangle to enable this property. The background will instantly color with white-black gradient.
- Set gradient color. In the right panel, under Properties–>Background–>Gradient, click the black square on the right side below the gradient in order to change the color on that end. In the color picker adjust the color to light blue, colorcode #66ccff by entering the color code under HEX. The color on the other side of gradient should remain white, colorcode #ffffff.
- Rotate gradient. Default gradient spans from left to right, but the gradient for the background should span from bottom to top. To adjust this, open additional properties under Properties–>Background–>Gradient, and set Angle to 90 deg.
5) Add Boat & make it Rock
One last set of things to do: add the boat image and animate it so it rocks. To make the boat rock, use a partial rotation effect. Center the partial rotation just beneath the center of the boat image by setting its origin accordingly. To make it go back and forth, set the animation to go in the opposite direction after it runs, and set the rocking motion so it continues indefinitely. Here’s how to do that:
Import the boat image and then set properties.
- Import boat.png
- Set name to boat
- Set position to X: 161 px and Y: 153 px
- Set iterations to Infinite.5.
- In object tree, drag the boat below water medium, in order to place it behind water medium, but in front of water dark. This will make the boat appear in the middle of the water.
After setting the basic properties, adjust the rotation point of the boat, as follows:
- In the right panel, under Properties–>Transforms–>Origin, set X: 50 % and Y: 65 %. This will set the rotation point slightly lower, and closer to the bottom of the boat.
- Because the animation should go back and forth, in the right panel, under Properties–>General–>Iterations, open the extra properties and tick Alternate. This will cause the animation to play alternately forward and backward.
Animate boat
The boat should rock from left to right. So far all the animations involved changing the position of objects. The next animation modifies the rotation of the image. Here’s how to do that:
- Create first keyframe at 0 seconds.
- Set first keyframe easing to Ease-in-out. This setting will cause the animation to start out and end slowly.Adjust rotation. In the right panel, under Properties–>Transforms–>Rotate, set Z: -5 deg.
- Create second keyframe at 1 seconds.
- Set second keyframe easing to Ease-in-out.
- Set rotation to Z: 5 deg.
After you complete these steps, the Stage should look like this:
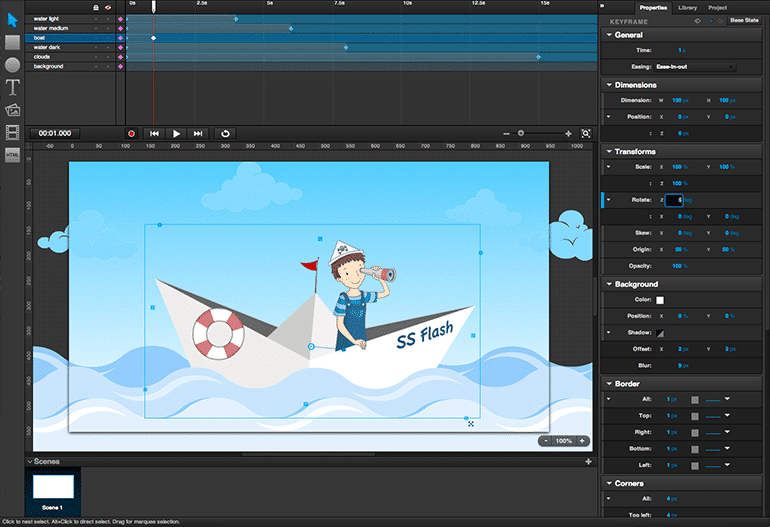
The final step is to export the code for the project and embed it in a web page.
Exporting is straightforward, but there are a few settings that can be adjusted prior to export. Normally, exported animations will work in Chrome and Safari browsers, but it is possible to add support for Firefox browser. In order to do this, in the right panel, go to Project–>Browser Support and tick Firefox. Leave other options unpicked.
Export project.
In the Menu Bar go to File–>Export Project. Select the folder where you would like the exported project to be saved.
